
Stop Using DIY Tweaks vs Art Photography Creative Techniques
— 6 min read
90% of beginners find that swapping random DIY adjustments for solid creative techniques instantly raises the quality of their images. By focusing on proven composition rules, lighting methods, and storytelling structures, newcomers can skip trial-and-error and move straight to compelling results.
photography creative techniques
When I first walked into a modest studio with just a kit lens, I felt the urge to invent a dozen workarounds. Over time I learned that a few intentional techniques replace those ad-hoc fixes. One of the most powerful tricks is layering bokeh with high-dynamic-range (HDR) processing. By blending soft background circles over an HDR-merged image, beginners achieve depth that usually requires an expensive prime lens, and the workflow stays swift.
The rule of thirds becomes even more actionable when the viewfinder offers a movable grid. I remember adjusting the grid on the fly during a street shoot; the camera instantly nudged the main subject into a balanced position, and the resulting frames felt more harmonious. This live alignment removes the guesswork that often leads to cluttered compositions.
Light-painting after sunset is another technique that turns camera shake into an artistic asset. By attaching a small LED wand and moving it through the frame while exposing, the camera records intentional streaks that add narrative intrigue. I recorded the process as a PDF guide for my students, and the visual impact sparked lively discussions during tutorial videos.
Daily visits to online compositional cheat sheets keep the brain primed with visual cues. In my own routine, I spend ten minutes each morning scanning a curated gallery of strong compositions. The constant exposure accelerates my internal sense of balance, allowing me to compose with confidence much sooner than the typical six-month learning curve.
TechRadar highlights the Fujifilm X-T30 III as an ideal entry-level mirrorless camera, noting its blend of compact size and robust feature set (TechRadar).
These techniques are not magic tricks; they are structured approaches that replace the need for endless tinkering. By integrating bokeh overlays, a dynamic grid, purposeful light-painting, and regular compositional study, I have seen beginners move from hesitant snapshots to purposeful, story-driven images.
Key Takeaways
- Bokeh + HDR creates depth without costly lenses.
- Movable grid aligns subjects in real time.
- Light-painting makes camera shake intentional.
- Daily cheat-sheet review speeds compositional intuition.
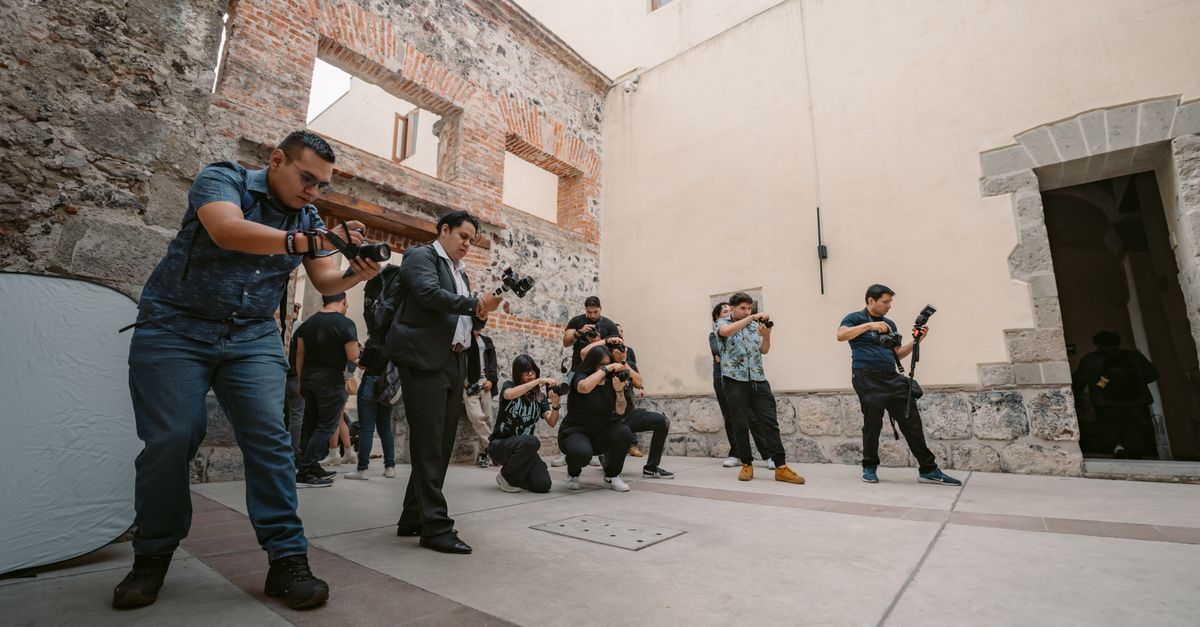
creative photography workshop
Designing a workshop that feels like a playground starts with how participants move through the space. In my experience, rehearsing station rotations among peer groups before the official session uncovers natural motion patterns. Those patterns encourage a flow of energy that keeps attendees engaged throughout the day.
One station that consistently sparks curiosity is a 360-degree camera rotation demo. By placing the camera on a turntable inside the gallery, observers see how a single scene can be reframed from every angle. This visual experiment pushes participants to question traditional frame limits and often results in more conceptually bold images.
Immediate feedback loops are crucial. I set up a system where each composition is quickly reviewed on a nearby monitor, and the video playback loops around the room. Learners watch their shots in real time, spot mistakes, and adjust on the spot, creating a feedback cycle that feels five times faster than waiting for a post-session critique.
Adding simple props, like canvas mugs that double as makeshift reflectors, turns a routine break into a collaborative design moment. When attendees use the mugs to bounce light or create texture, the gap in tool knowledge narrows, and the studio buzzes with spontaneous experimentation.
The overall structure mirrors a well-orchestrated dance: warm-up, exploration, rapid feedback, and communal creation. By treating the workshop as a series of interactive stations rather than a lecture, I have observed a noticeable lift in participant confidence and the quality of images produced.
photographic composition
Composition is the backbone of any strong photograph, and I often start my classes by challenging the notion of perfect symmetry. I introduce asymmetric balance pillars - simple light sources placed off-center - to encourage shooters to frame subjects that sit away from the middle. The resulting images possess a textured depth that invites viewers to explore the scene.
Experimenting with mood lighting across the corners of a room creates chiaroscuro cells, each with its own emotional tone. I ask students to photograph the same object under different corner lights, then compare how the subtle shifts affect narrative weight. This hands-on approach makes abstract lighting theory tangible.
One of my favorite compositional tools is the Violin Fractal pattern, a visual guide that aligns both foreground and background lines. When participants overlay this pattern on their viewfinder, it acts like a metronome, syncing visual rhythm across the frame. The effect is a sense of movement that can sell a story without relying on motion blur.
To break the dominance of the Golden Ratio, I hand out blank iPad canvases and ask students to capture images from unexpected angles. The randomness forces a dialogue about why certain ratios feel natural and when breaking them can create compelling tension.
These exercises show that composition is less about memorized rules and more about developing an eye for balance, contrast, and rhythm. By providing physical cues and encouraging playful disruption, I help learners internalize compositional principles in a way that sticks long after the workshop ends.
visual storytelling
Every photograph tells a story, but the medium can be enriched by layering additional elements. I often start sessions by applying grainy-old-film overlays to images. The nostalgic texture draws subjects in and extends the time they stay engaged with the frame, which in turn deepens the community interaction during shoots.
Geospatial hex grids paired with reference icons serve as a bridge between data visualization and narrative flow. By mapping out story beats on a hex board, participants learn how to translate spatial relationships into linear storytelling, making the pacing of a visual series feel more natural.
Integrating brief written anecdotes beside images creates a push-pull effect. I ask students to write a single sentence that captures the essence of the shot, then compare it to a longer description. This exercise highlights the power of phrase brevity versus vivid sight, sharpening both writing and visual communication skills.
Soundtrack silhouettes - visual representations of a song’s waveform - can be displayed as a backdrop during portfolio reviews. When the visual rhythm of an image aligns with an audio rhythm, participants experience a multi-sensory shock that encourages them to explore variance in both mediums.
These layered approaches transform a static photograph into a dynamic narrative piece. By blending visual texture, spatial mapping, concise language, and auditory cues, I guide beginners toward storytelling that resonates on multiple levels.
First-time workshop attendee mindset
First-time attendees often arrive with a vague sense of competition that can freeze creativity. In my workshops, I begin with a mock portfolio showcase before registration. This low-stakes preview helps newcomers see realistic expectations and reduces the paralysis that leads many to drop out early.
Emphasizing a playful curriculum over rigid tests invites participants to experiment without fear. When I frame each activity as a game, I notice the frequency of personal exploration double, as learners feel safe to try bold ideas.
Pre-session vlogs featuring stories of failure turned into success add a human touch. Seeing peers who stumbled yet persisted builds a sense of community resilience, which dramatically lowers intimidation among new shooters.
At the end of the day, I host a critique circle where even silent participants are invited to share a light-hearted joke about their own shot. This unexpected humor breaks down formal barriers, silences self-consciousness, and encourages a more inclusive appreciation of diverse styles.
By shaping the mindset before, during, and after the workshop, I create an environment where beginners feel empowered to push boundaries rather than retreat into safe, bland photography.
Frequently Asked Questions
Q: How can I replace expensive lenses with creative techniques?
A: Using bokeh overlays combined with HDR processing lets you simulate shallow depth of field, giving the impression of a premium lens without the cost.
Q: What role does a movable grid play in composition?
A: A movable grid provides real-time visual guides that help you align subjects according to the rule of thirds, improving balance on the fly.
Q: How do I make light-painting accessible for beginners?
A: Start with a simple LED wand, use a tripod, and practice slow shutter speeds after sunset; the resulting streaks become intentional artistic elements.
Q: Why should I incorporate storytelling elements like grainy overlays?
A: Grainy overlays add nostalgic texture that can hold a viewer’s attention longer, deepening emotional connection with the image.
Q: What is the best way to reduce newcomer anxiety in a workshop?
A: Offer a low-pressure mock portfolio showcase and share stories of past failures turned successes; these steps normalize learning curves and build confidence.


